Sorry but, with all elastomeric finishings, it comes down to scraping. Excellent ol Recreational vehicles require excellent ol effort. Utilize a chemical paint stripper for around roof components and locations you can't get it all off. You could utilize it over the whole roofing system but, the question is ... would you wish to? The stuff is just nasty to work with and really unhealthy to breathe and do not let it get in contact with your skin.
 2021 Roof Coating & Sealing Costs
Go Now: https://www.dcroofingarizona.com/commercial/roof-coatings-tucson/tpo-roof-coating-installation/
If (like me) you are the type of person who applies caulk with the goal of getting professional-looking, smooth joints, then the application and look of lap sealant on a camper roofing system will toss you for a loop. Lap sealant looks more like somebody was attempting to put icing on a cupcake.
And if somebody has recaulked a location, there are much more blobs on top of the older blobs. It appears counter-intuitive to the goal of preventing water intrusion since the application does not always motivate water to drain away. Even an expertly applied application of lap sealant around an air vent looks more like a mini retention pond after a rain.
If you require to recaulk on area on your camper's roofing system, you first need to clean all those unclean mounds and, per the producer, apply more mounds of caulk on top of the old caulk rather than removing it. You are expected to check your roofing system at least when a year and apply caulk as needed.
The previous owner might not have actually cleaned the old caulk before plopping more mounds of brand-new caulk on top. We've gotten rid of old caulk that removed quickly due to the dirt and grime underneath. We've found air pockets between layers of caulk. We have actually even discovered caulk mounds that seeped out small water beads when pressed, most likely due to pinholes.
When you're ready to inspect your roofing, begin by providing the roof and the caulk an excellent cleaning. Here's a link to our Do It Yourself roof cleaner. After rinsing everything off, take notice of where water might be pooling; especially around the caulk. Once it's dry, utilize chalk to draw a circle any areas that have poor drainage.
What Is A Roof Restoration?
Search for signs of brittleness, cracks, pinholes, little cratering, or edges that quickly raise up. Again, utilize the chalk to draw circle those areas that require attention. Air pockets, cracks and crevices within numerous layers of old lap sealantI choose to remove old caulk instead of blob more on top.
To prevent tearing a rubber roof membrane or scratching an aluminum roofing, vibrate the tool around the edge of the caulk until it begins to raise. It's simplest to do this when outdoor temperatures are above 80 degrees, otherwise you might utilize a hot air weapon or blow dryer to thoroughly heat the caulk.
The is to get the old caulk as flush to the rubber surface area as possible. Have a small tub, denatured alcohol, and rags close by to tidy up as you go. Store the can and rags in the small tub. Avoid letting the denatured alcohol reach the rubber roofing system for too long.
Have a tub convenient for all the old sealantOnce most of the old caulk has been gotten rid of and the surface has been cleaned up and dried, use painter's tape to specify the perimeter of the area to be caulked. All the old sealant has actually been removedSelf-leveling lap sealant truly doesn't level itself out to a good finish.
Being particular about how caulk looks, and that it promotes appropriate drainage, I utilize a customized application process. It's great to know ahead of time how the caulk will behave. A tube of caulk that is more than one year old can be harder to feed using a caulk gun and might not self-level as smoothly as a recently produced tube of caulk.
Less than 6 months is great. If there's no date, simply avoid televisions that have dust on them or worn bottom edges. Utilize a piece of cardboard and lay a small item like a screw or bolt in the middle of the cardboard to test out your caulk. Use a 3/8 inch bead of sealant in a straight line down the length of the cardboard, making certain to also cover the screw or bolt.
Elastomeric Coatings, Acrylic Primers, Sealers, And More
The sealant should begin skinning over in 5 minutes. Older tubes of sealant might not self-level as well or they may skin over much more quickly. Repeat this test for each tube of sealant as you are all set to utilize it. When you understand the how your tube of sealant will carry out after application and how rapidly it will develop a skim coat, you can start using beads of sealant.
 Roof Coat Elastomeric Coating Product Data Sheet
Keep the sealant beads approximately 1/2 inch far from the painter's tape (or whatever distance your tube test spread showed). Within 5 minutes of application, dip your fingers or a plastic putty knife into the water/Dawn mixture, then "help" direct the sealant leveling by utilizing light pressure to press the bead flow into the preferred slope or shape.
Utilize the exact same method to produce a feathered edge towards the painter's tape. As quickly as the sealant develops a skin coat, get rid of the painter's tape. Lap Sealant Treatment Time5 Minutes Skins over4 Hours Waterproof48 Hours 80% Cure30 Days 100% CureAnother alternative is to skip using lap sealant completely and use roofing sealant tape instead.
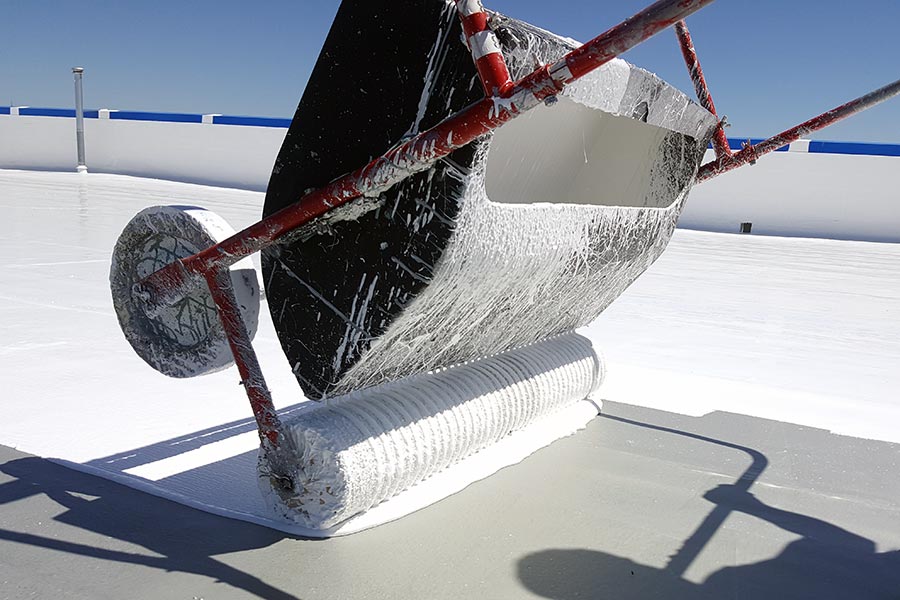
The price of the tape is equivalent to using lap sealant (and maybe a little less expensive). We utilized Beech Lane tape, which we picked up at Amazon for under $35 (here's the link if interested). Rubber Sealant Applied To Camper Roof CleanedAnd here's a photo after using a fresh coat of rubber roof covering.